Hi guys, this tutorial will guide you through the complete steps to root your Samsung Galaxy F13 using the Magisk app. We will be using the official Odin app from Samsung also in this procedure. So the whole process will be safe and sound.
Please note that this rooting method is compatible only for Galaxy F13 SM-E135F variant only.
First let me brief you with it’s specifications before proceeding with the rooting steps.
A brief intro to Galaxy F13 specs
The F13 is a budget Android Smartphone with decent specs in it’s hood. It has a triple camera assembly with 50MP main CMOS sensor. The F13 holds an enormous 6.6 inches PLS LCD touchscreen display having Corning Gorilla Glass 5 protection along with it. The side mounted finger print sensor will provide easy of access. The 6000 mAh Li Po battery is more than enough for a couple of days usage.
The F13 comes with 64GB storage & 4GB RAM/128GB storage & 4GB RAM options. The Galaxy F13 is factory installed with Android 12 & One UI Core 4.1. It also has a 3.5mm stereo jack for the music lovers who still prefer a wired connection over wireless one.
Colour options
- Waterfall Blue, Sunrise Copper and Nightsky Green
Now lets proceed to the rooting tutorial.
Before proceeding any further please make sure that you have made a complete backup of your phone to prepare for worst case scenario. Also keep in mind that rooting will void your warranty and samsungsfour.com will not be liable for any loss of data nor bricking of the device.
Steps to root Galaxy F13 using the Magisk app
1. First you need to perform the OEM unlock and enable USB debugging on your Galaxy F13 device.
Enabling Developer mode
To enable “Developer Options” on your Galaxy Smartphone go to Settings>About phone>Software Information, and tap on the “Build number” 10 times until you get a message that you are a “developer“.
Once done you will see an additional menu entry in the “Settings” main menu called “Developer Options” as shown below in the screenshot.
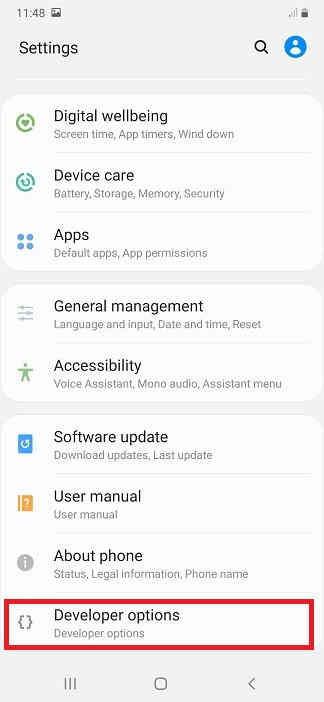
Once you have enabled the “Developer Options” tap on it and you will see a similar screen as shown below (These are from One UI 2, if your UI version is something else slight difference maybe there).
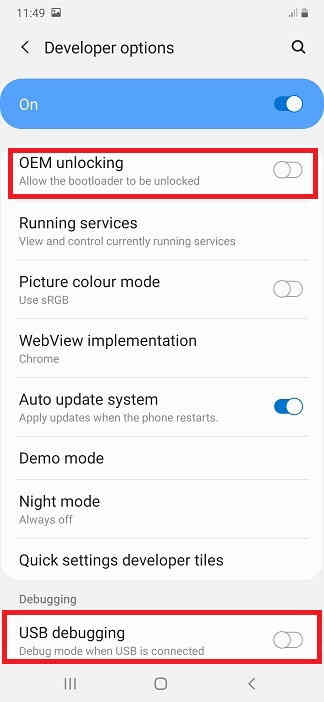
Now tap on “OEM unlocking” and “USB debugging” to enable it. If you get a popup warning, tap enable if you would like to proceed.
Unlocking bootloader
Also you may need to unlock bootloader from the Download Mode. This is a new security feature on the latest version android firmware.
For that first switch off your phone and connect it to the PC using a USB cable and press and hold the Volume Up and Volume Down keys together until you see the bootloader screen as show below.
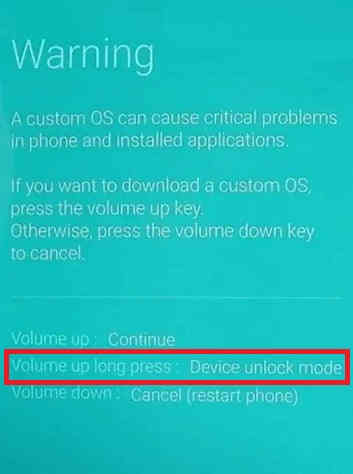
Next please long press Volume Up key to enter “Device unlock mode.”
For that you may also try the below tutorial which will help you to enable the same.
- How To Enable USB Debugging And OEM Unlocking On Samsung’s Galaxy One UI?
- How To Unlock Bootloader On All Galaxy Android Smartphones? (Latest Updated Method)
2. Now download the latest version of “Magisk App” from the below link.
After downloading please install it. Kindly make sure to allow installations from “Unknown Sources” from the “Settings”->”Security” before trying to install apps from outside of Play Store.
3. Now download the same firmware version which is currently present on your phone to your computer. To know the “AP”, “CP”, “CSC” version of your phone try the code “*#1234#” into your phone’s dialing keypad.
Downloading firmware files
Please use the below links to download the firmware for your Samsung Galaxy F13. Please note that once you click download link on the next page you will be guided to a 3rd party website were you will be able to download the required firmware for free.
Once downloaded please extract the file and you will get similar files like shown below.
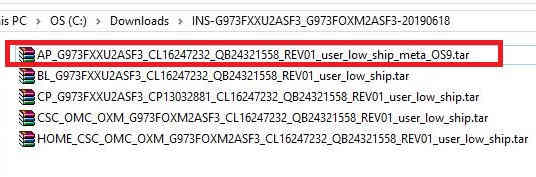
4. Now check for a file with “AP” in the starting as shown in the above image. Now copy that file alone to your phones “Internal Storage“.
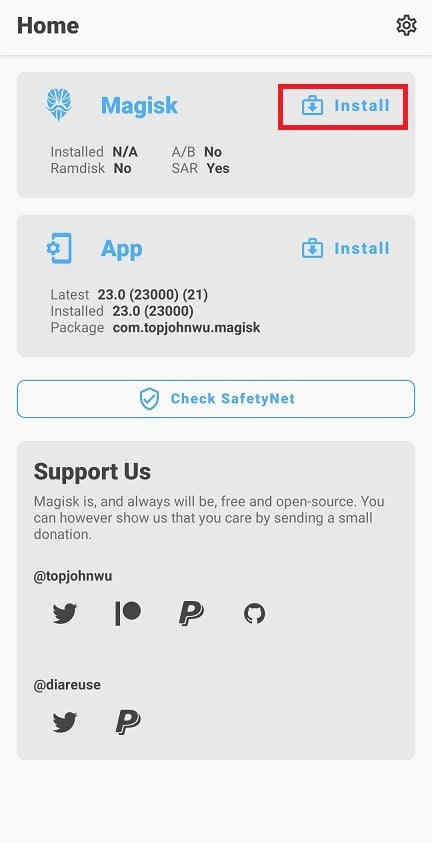
5. Once done open the “Magisk” app and tap on the “Install button” near to “Magisk“. Please check the below screenshot for reference.
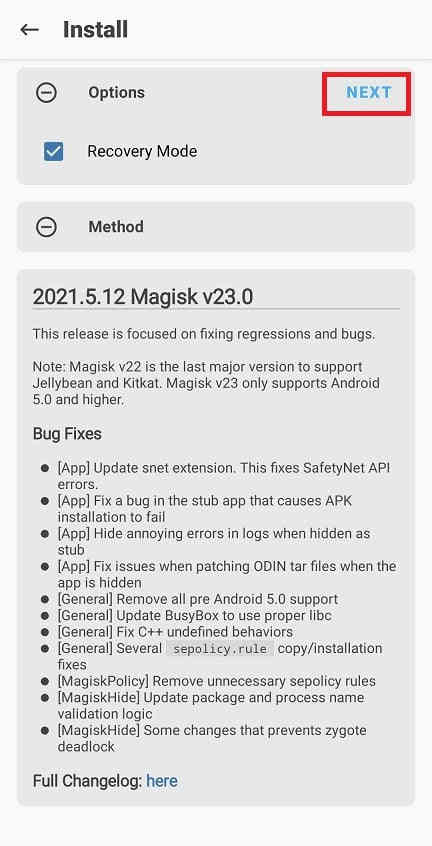
6. When you get the below page tap on “Next“.
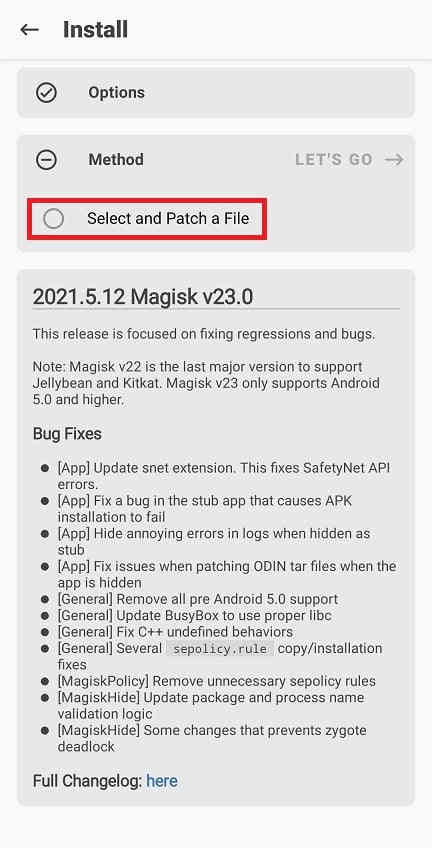
7. Now you will get the below page, there you need to tap on “Select and Patch a File” and select the “AP” file you have already copied to your Galaxy F13’s internal storage. Now this file will be patched and will be named as “magisk_patched.tar“. It will be found in the “Downloads” folder. Copy that file back to your computer desktop.
Entering Download Mode
8. Once done please switch off your phone and enter it into the “Download Mode”. First you need to connect your phone to your PC using a USB cable. To enter into the download mode first you need to enter into the “Recovery Mode” for that press and hold the “Vol Up” + “Power” buttons at the same time and release the “Power” button when you see your phone model number on the screen. Now you will be entered into the “Recovery Mode”.
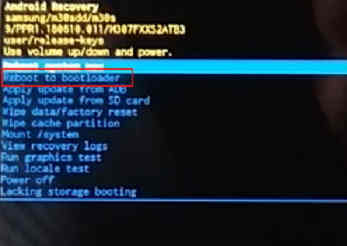
The above image shows the “Recovery Mode” menu. Here select the “Reboot to bootloader” option and confirm the action to enter into the “Download Mode”. Please use “Vol Up” and “Vol Down” buttons to toggle through the options and “Power” button to confirm a selection.
9. Now download the latest Odin app from the below link.
Once downloaded please open the “Odin.exe” file and tap on the the “AP” button and select the patched file (“magisk_patched.tar“) which was copied from your phone back to your computer. Also please click “BL”, “CP” and “CSC” buttons on the Odin and select appropriate files. Please ignore “UMS/Home CSC“.
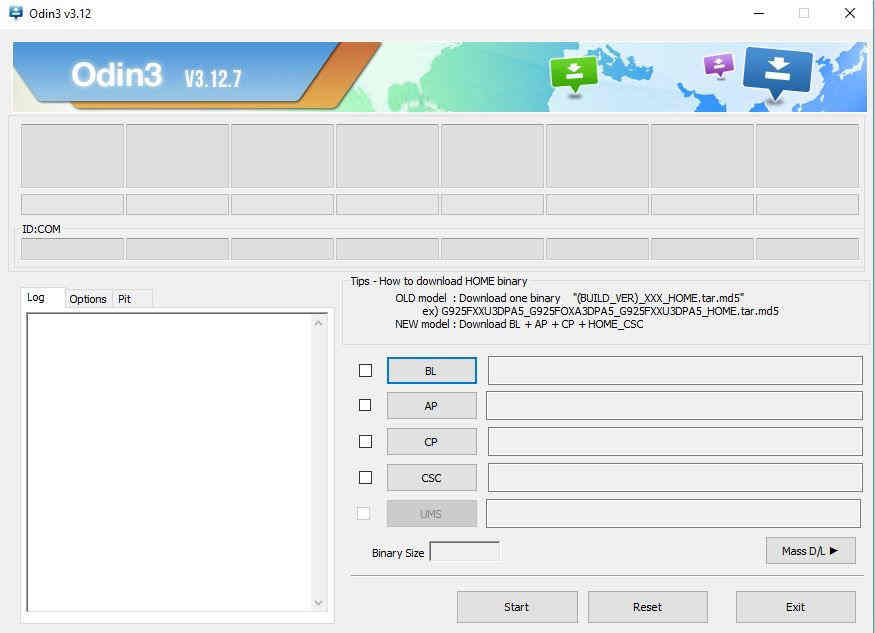
Now go to Odin’s “Options” tab and uncheck “Auto Reboot” and click the “Start” button in the Odin to start the flashing process.
Once flashing is finished enter your phone into “Recovery Mode” again and perform a “wipe data/factory reset”. And reboot your phone. When booted up your F13 will be rooted with super user privileges.
If you have faced any issues while going through the above tutorial please have a look at the troubleshooting steps given below.
Troubleshooting
No matter what how hard you try there can be errors and issues when you do the rooting. Don’t worry because we have all the solutions for normal errors that may occur on your F13 during the rooting process. Please have a look at them below.
- How To Resolve Odin Flash Failed Error On Galaxy Smartphone? (All Error Solutions)
- How To Resolve “Verification Failed, Unable to restart your device” Error On Galaxy Smartphone? (Updated)
- How To Fix “An Error Occurred While Updating The Device Software” On Galaxy Smartphone?
Normal queries for this tutorial
- How to get root access/superuser/admin privileges on my Samsung Galaxy F13 SM-E135F?
If “How To Root Samsung Galaxy F13 Using Magisk?” tutorial really helped you, please give a like/share on social networking websites.