Hi friends, this tutorial will details all the steps to root your Samsung Galaxy Core Prime On Lollipop 5.1.1 firmware for all models.
Image Credits: Samsung Electronics
Here I am going to provide you a detailed and exclusive tutorial on rooting your favourite Samsung Galaxy Core Prime. The beauty about this tutorial is that you can root almost any model variation of Galaxy Core Prime like SM-G360G, SM-G360GY, SM-G360T, SM-G360T1, SM-G361H or SM-G361HU. So sit back and relax.
But, please note that rooting will void your warranty, but you can always unroot it to reinstate warranty. SamsungSFour.Com will not be liable for any damage caused as a result of executing the below given steps.
Before proceeding with the procedure given here please make sure that you have made a complete backup of your phone memory including contacts, photos etc. Also the phone battery should be charged to a min of 80%.
Steps To Root Samsung Galaxy Core Prime SM-G360G, SM-G360GY, SM-G360T, SM-G360T1, SM-G361H or SM-G361HU running on android Lollipop 5.1.1 firmware
1. First you need to download the appropriate file for rooting Galaxy Core Prime from anyone of the the below given links.
1. Auto Root Package For Samsung Galaxy Core Prime SM-G360G
2. Auto Root Package For Samsung Galaxy Core Prime SM-G360GY
3. Auto Root Package For Samsung Galaxy Core Prime SM-G360T
4. Auto Root Package For Samsung Galaxy Core Prime SM-G360T1
5. Auto Root Package For Samsung Galaxy Core Prime SM-G361H
6. Auto Root Package For Samsung Galaxy Core Prime SM-G361HU
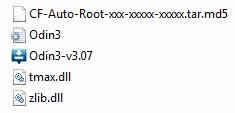
Once downloaded please extract it to your computer desktop. The files contents will be some what same as shown in the below snapshot.

3. Now in order to root your phone, you need to enable USB debugging on your Galaxy Core Prime, please follow the below tutorial to enable it.
How To Enable USB Debugging On Galaxy Smartphone (Lollipop 5.0 or Higher)?
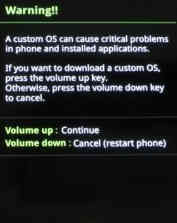
4. If you enabled USB Debugging now you can put your Galaxy Core Prime into “Download Mode“, to do it switch off your device and press and hold “Volume Down+Home+Power buttons at the same time until you get a warning screen like the one given below.

When you get the warning window press “Volume Up” button and you will be entered into “Download Mode“. The below snap shot is an example of the final download mode screen.

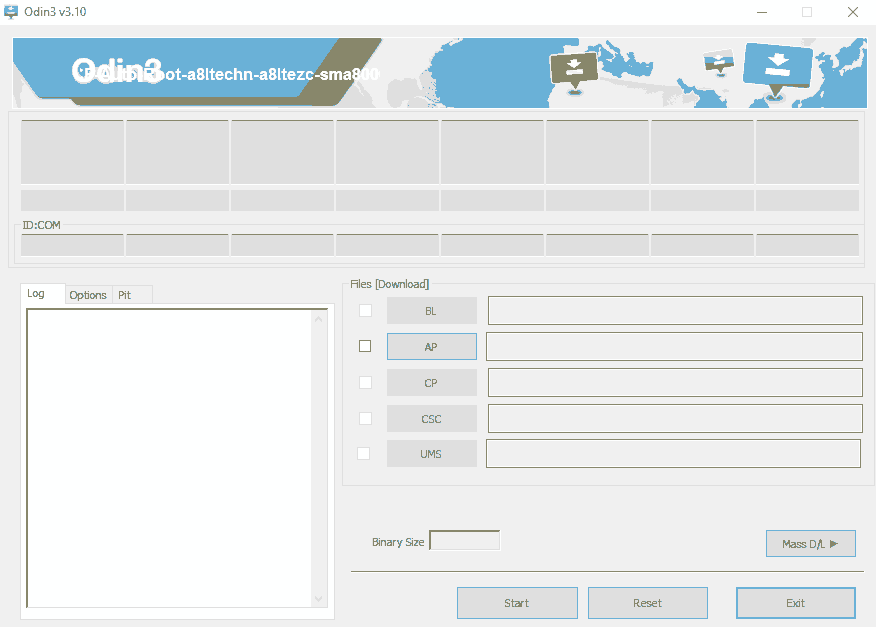
4. Now please open Odin and connect your Galaxy Core Prime with your computer using a USB data cable. If you get an “Added” message from the Odin, a successful connection can be confirmed. Now click the “AP” button and select the extracted “.tar.md5” file from your PC desktop. You can refer the below given snapshot if you want.

Please make sure that “Auto Reboot” and “F. Reset Time” options are only check marked in the Odin.
5. Once confirmed please click the “Start” button in the Odin and wait for the rooting process to complete. After the process is finished your device will restart and you will attain super user privileges on your Galaxy Core Prime.
Normal queries for this tutorial
- How To Root Samsung Galaxy Core Prime SM-G360G, SM-G360T, SM-G360GY and SM-G360T1 running Android Lollipop 5.1.1 firmware?
- How To Root Samsung Galaxy Core Prime SM-G361H running Android Lollipop 5.1.1 firmware?
- How To Root Samsung Galaxy Core Prime SM-G361HU running Android Lollipop 5.1.1 firmware?
If you have faced any issues while rooting your Samsung Galaxy Core Prime SM-Core Prime SM-G360G, SM-G360GY, SM-G360T, SM-G360T1, SM-G361H or SM-G361HU running Android Lollipop 5.1.1 firmware, please feel free to post it in the comment section below, don’t worry I will help you as fast I can.
If “How To Root Samsung Galaxy Core Prime On Lollipop 5.1.1?” tutorial really helped you, please give a like/share on social networking websites by using the below given buttons.
